How to take screenshots in Windows machines?
Taking screenshots is really helpful while troubleshooting an issue, or when you want to show something to a friend in a different location.
If you want to take screenshots on your IOS mobile device, click here.
How to take screenshots on Mac machines?
But how can we take screenshots in windows?
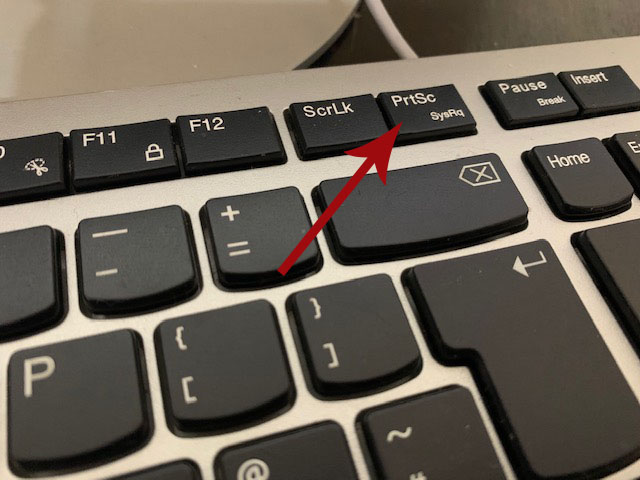
Using PrtScr button on keyboard:
One way to take screenshots is to use the PrtScr key on your keyboard. Pressing this button on your keyboard takes a screenshot of your current page and then you can go to Paint, Photoshop or any other multimedia editing app and paste it using Ctrl+V buttons on your keyboard.

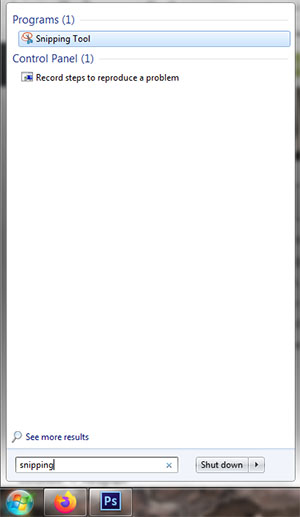
Using Snipping Tool on Windows
Using PrtScr button on your keyboard will take a screenshot of the entire screen, but using Snipping tool you can define the part where you want to take screenshot from. This small and useful app is already provided in your windows machine by Microsoft so you do not need to install it separately. You just need to search for it by clicking on Start menu on your windows and searching for Snipping then opening it.

Using this great tool you can choose from where exactly you want to take screenshot, it will not take screenshot of your entire screen automatically. After running this app, you just need to select the screen you want to be in your screenshot and then save it whenever you want on your PC.


