How to stop auto updates on Windows 10

Windows is the most popular operating system that millions of users around the world are using it. Microsoft creates and pushes new updates of Windows 10 from time to time to keep this popular operating system up to date and secure. This updates are being installed automatically on your windows machine. Sometimes for various reasons you might want to stop this automatic updates.
How can we stop automatic updates on Windows10?
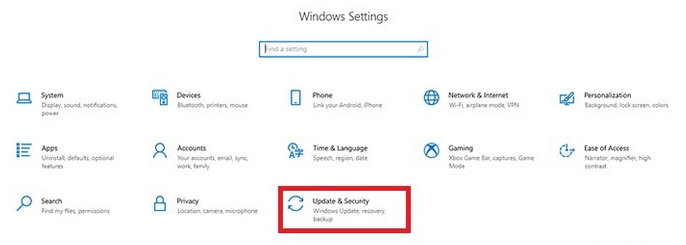
- Right Click on the Start menu and click on Settings.
- On the Windows Settings page, select Update and Security:
3. Select Windows Update from the left menu.
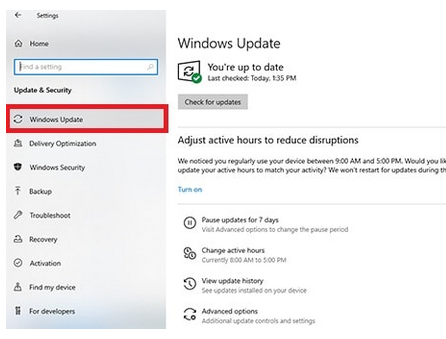
4. Click on Advanced Options:
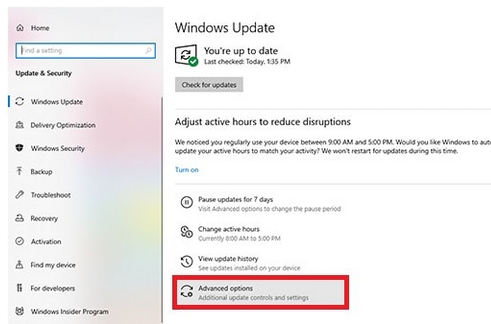
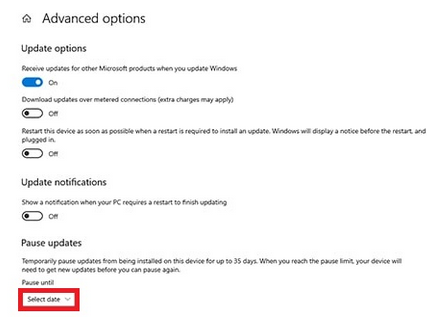
5. On the Advanced Options page in the Pause Option section, click on the drop-down menu and choose the date when you want the auto updates get enabled again. For example if today is November 20, you can choose December 20 which means that auto updates would be disabled until the specified selected date. Auto updates can be disabled for max. 1 month.
For re-enabling auto updates, you need to click on Resume updates option from the same drop-down menu.
Because of security reasons we strongly recommend having auto updates always enabled so Microsoft can update your windows and make sure if there are any bugs with the previous versions, they are being resolved with the new updates on your PC.